A4: Subtractive Manufacturing
Tiny Boxes!
For my milling assignment I made two tiny boxes. A truly mini box that was originally meant to just be a test piece but I absolutely love how cute and tiny it is, and a larger box with an engraved pattern.
Mini Box
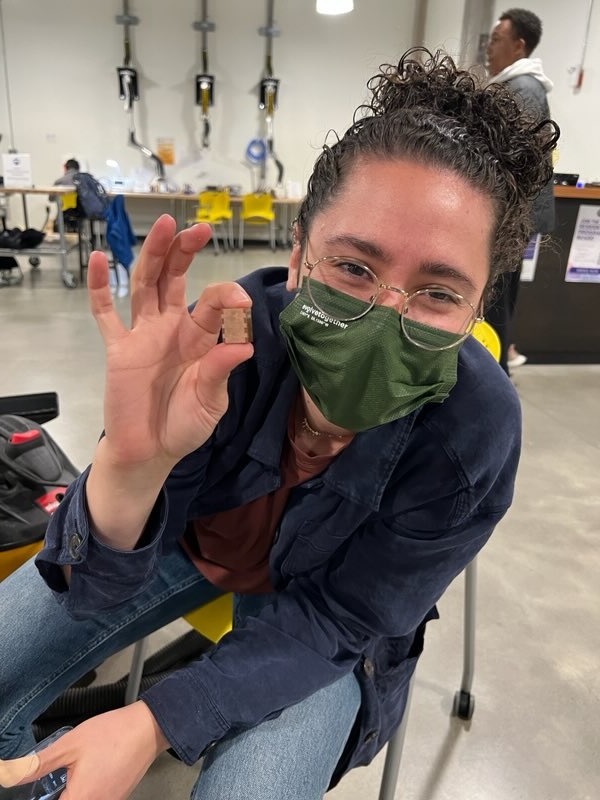
The mini box is just too cute 🤩
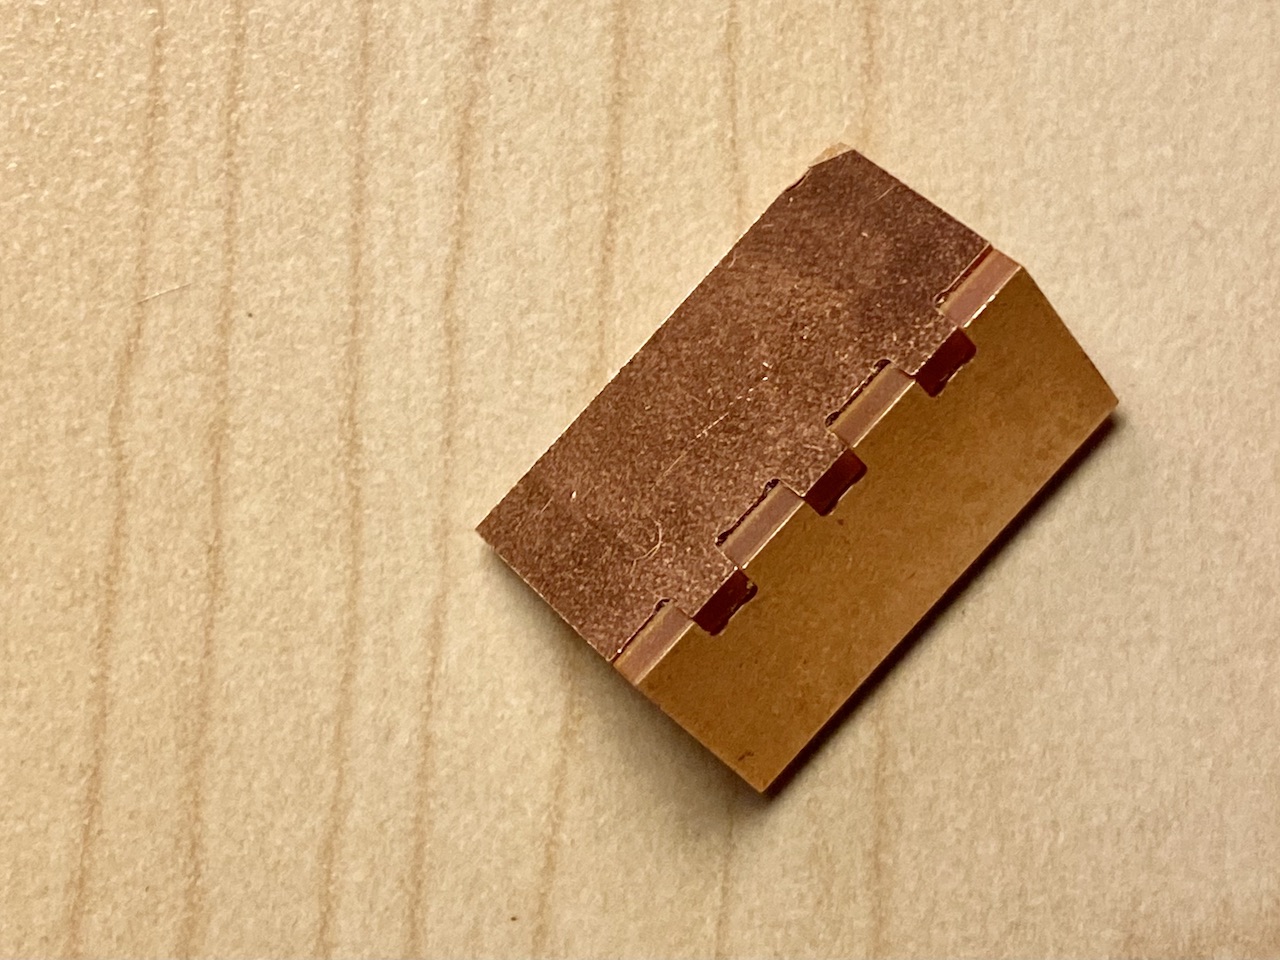
This box has four pieces and is open on the top and bottom. It measures 12.3 mm x 15.1 mm x 20.1 mm.
Pattern box
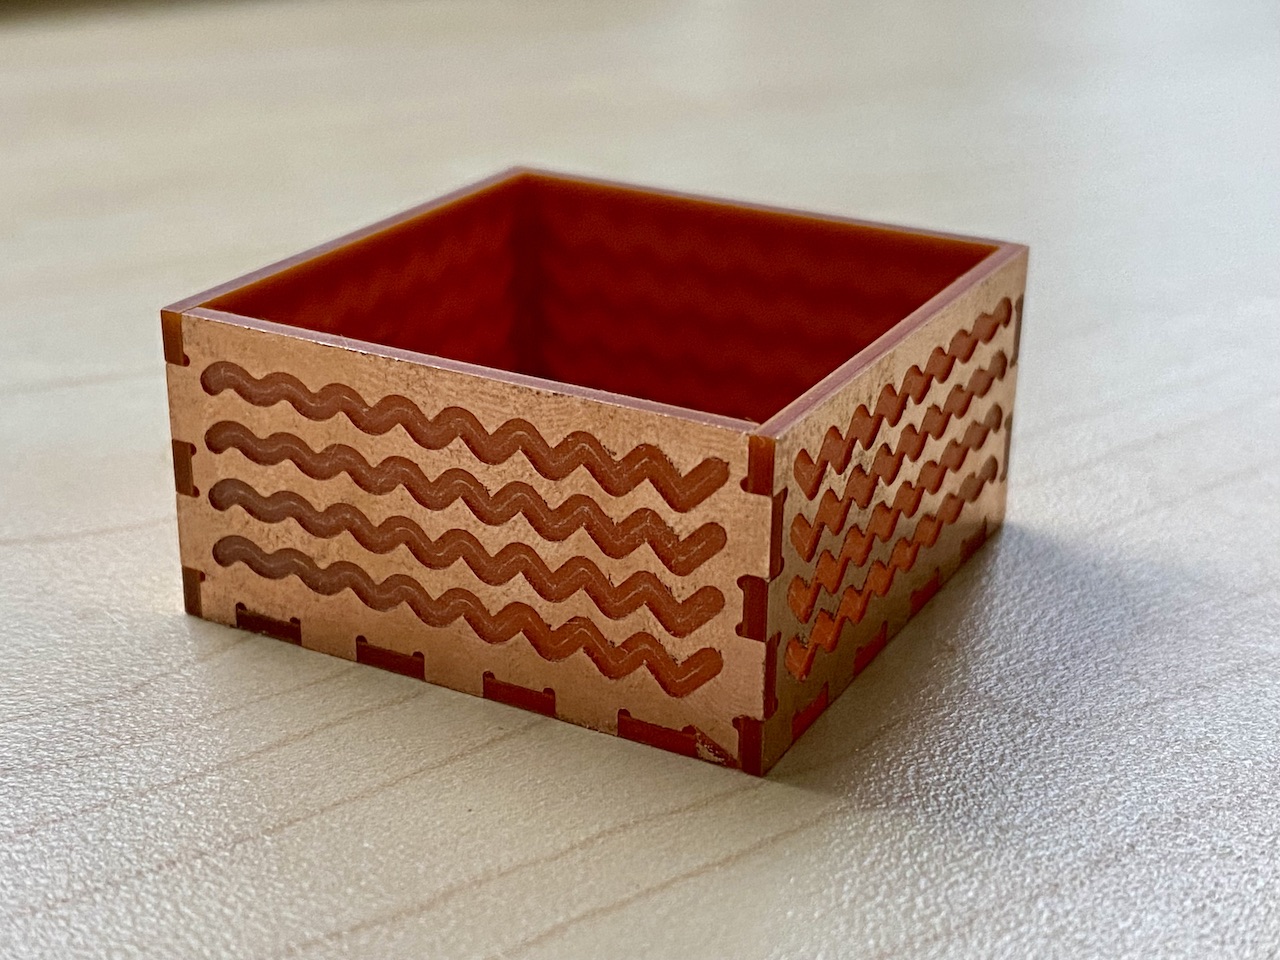
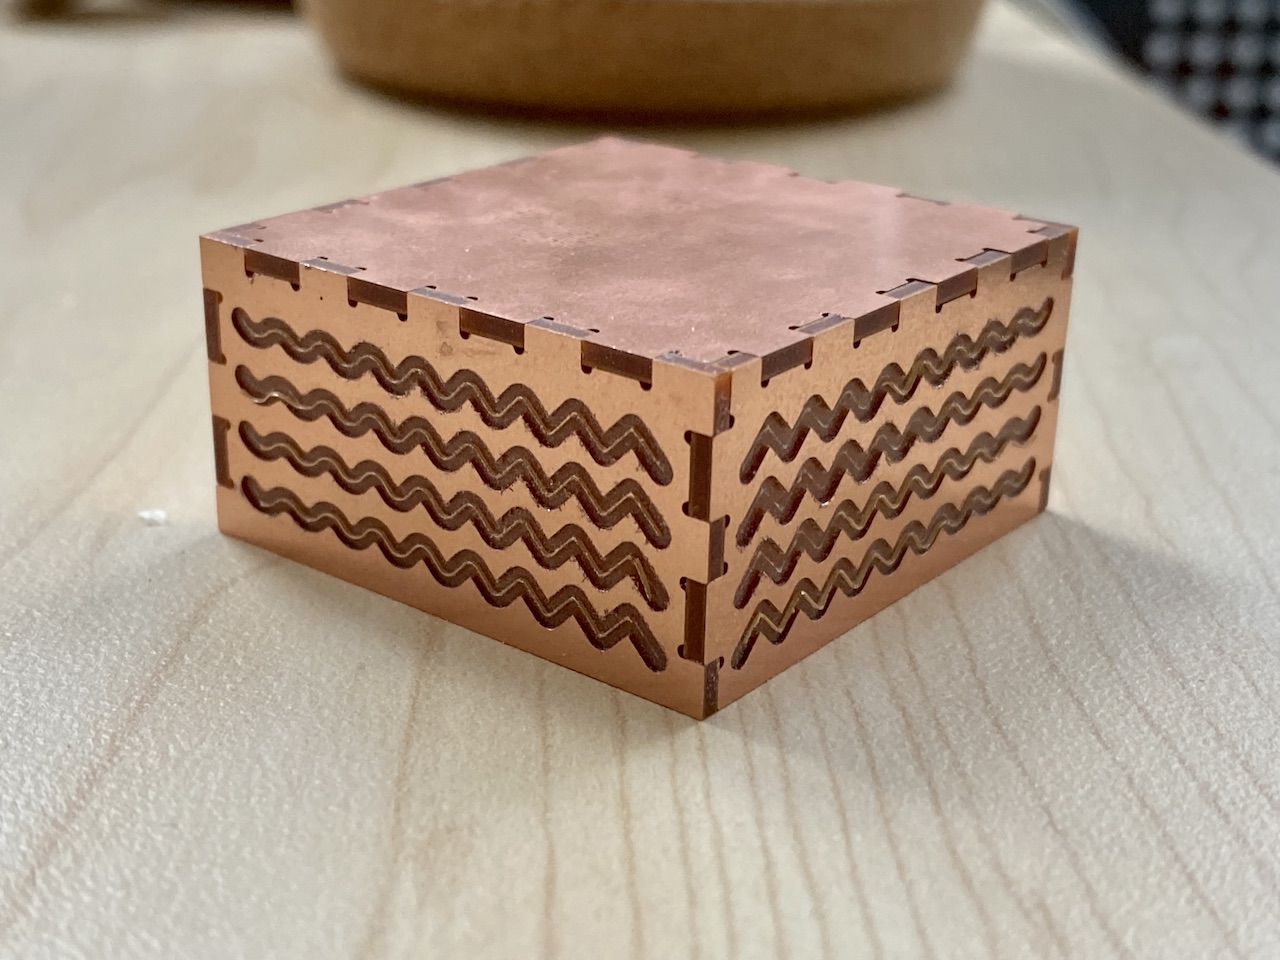
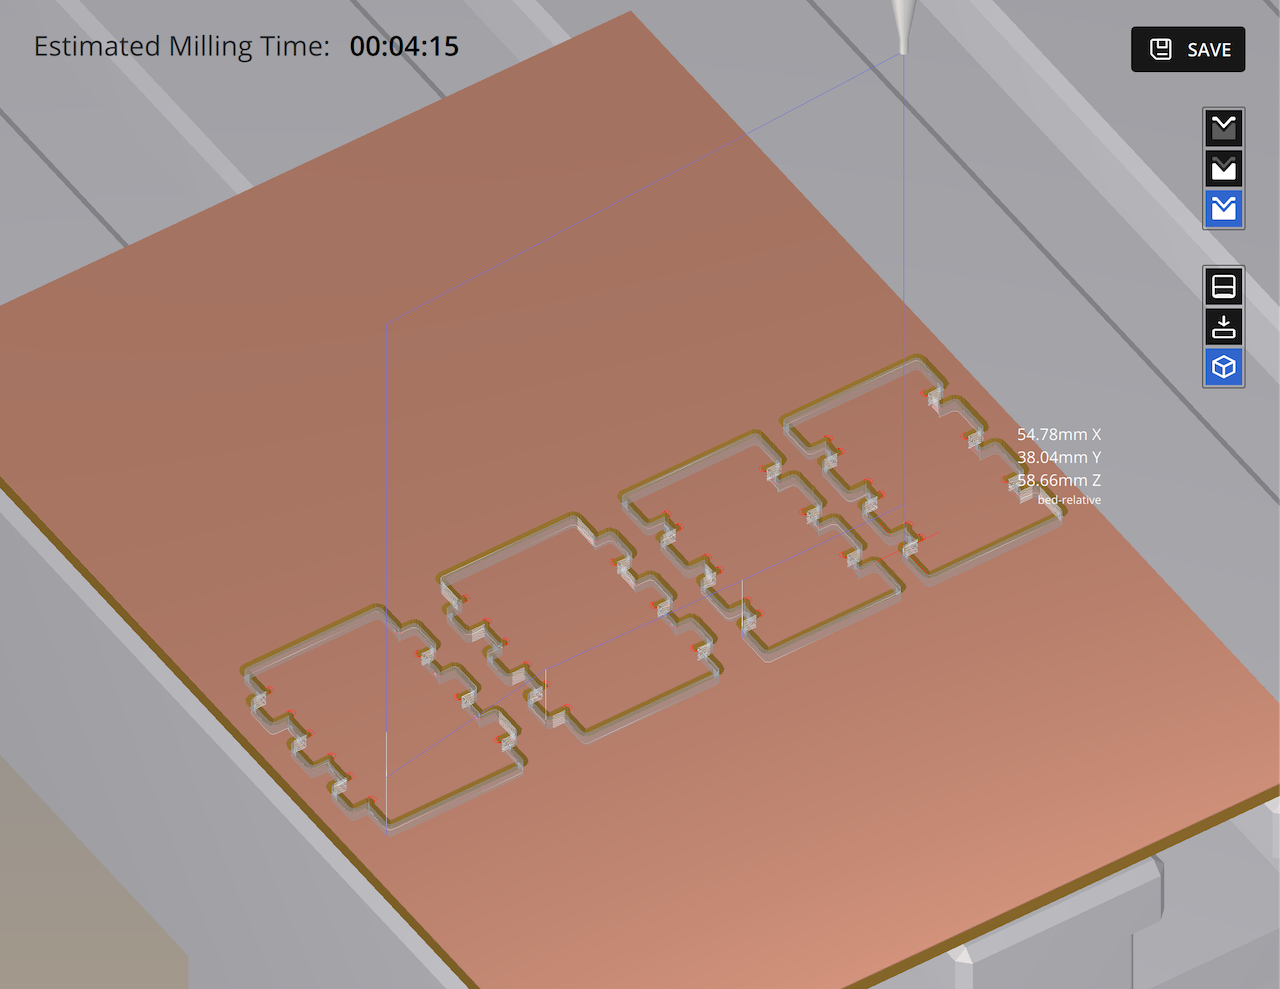
The pattern box uses the same box joints as the mini box. It is constructed from five pieces with an open top. The box measures 40.08 mm x 40.08 mm x 20.09 mm.
Process

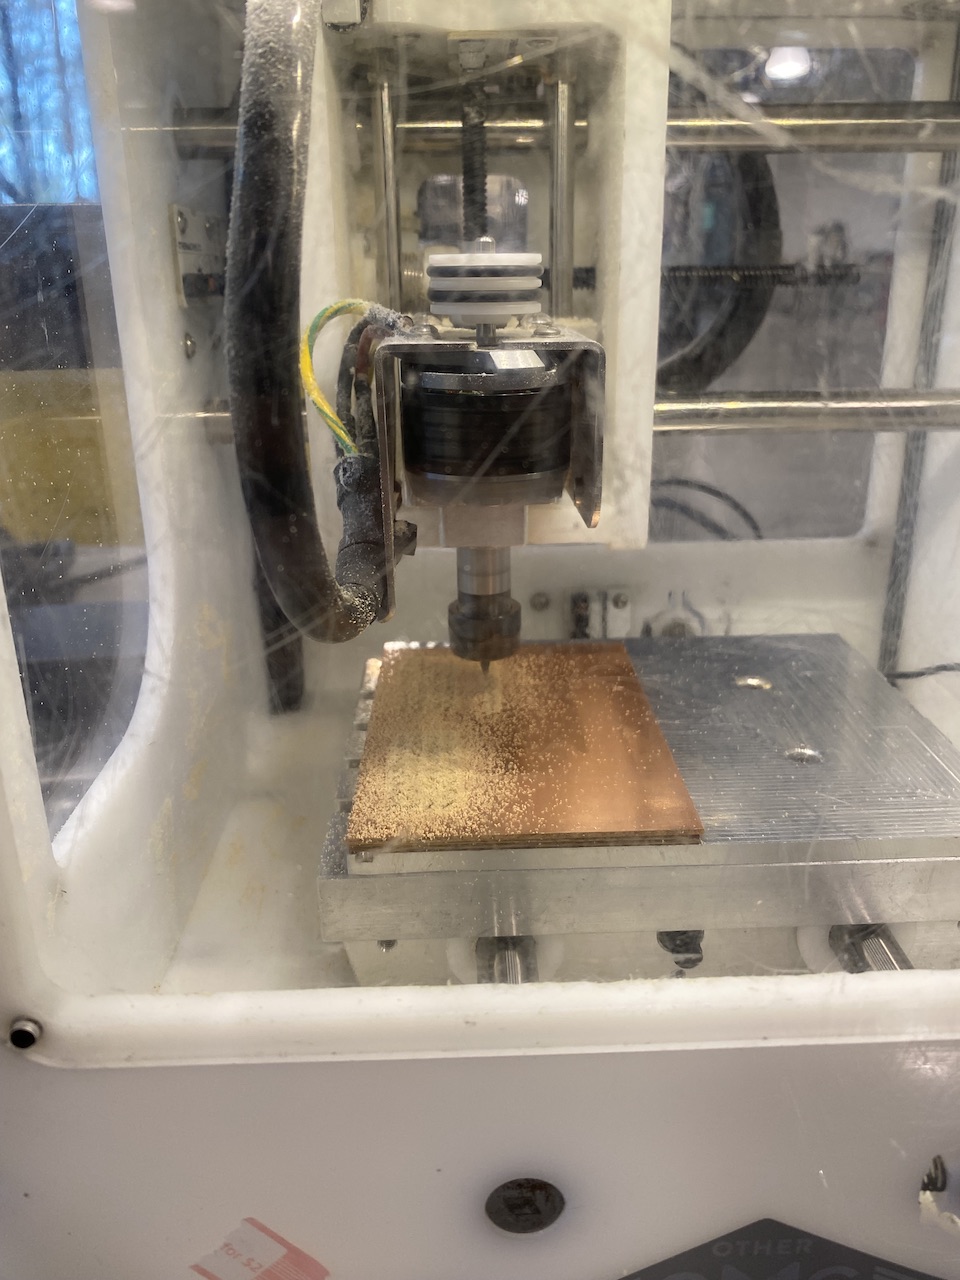
Learning to use the mill
It took me a few tries to get a successful cut on the mill.
On the frist cut, I didn’t turn off “Traces” and got an outline of my pieces rather than a cut of them. It looks kind of cool, but is definitely not going to work like the joint I modeled.
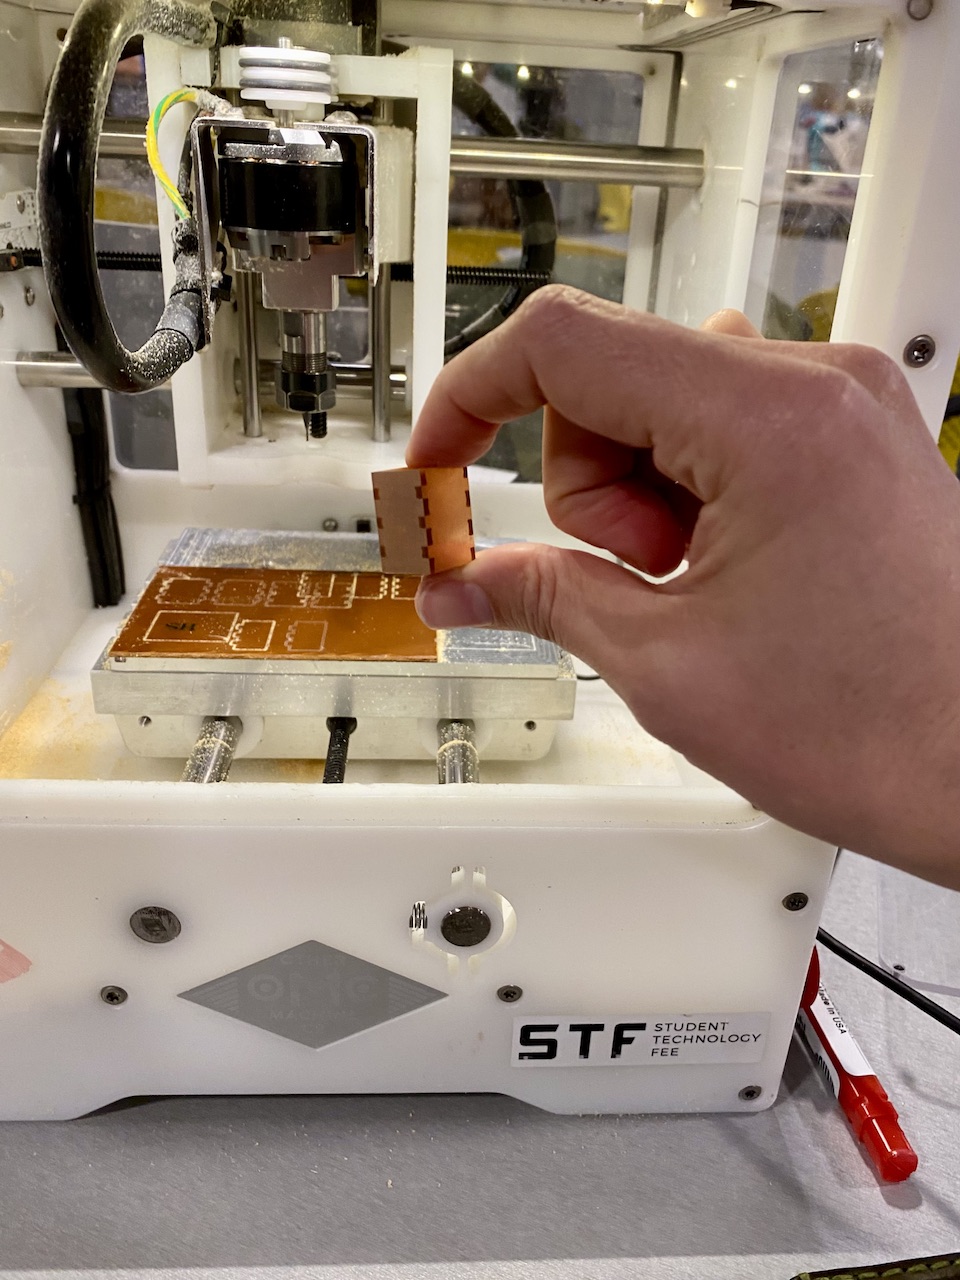
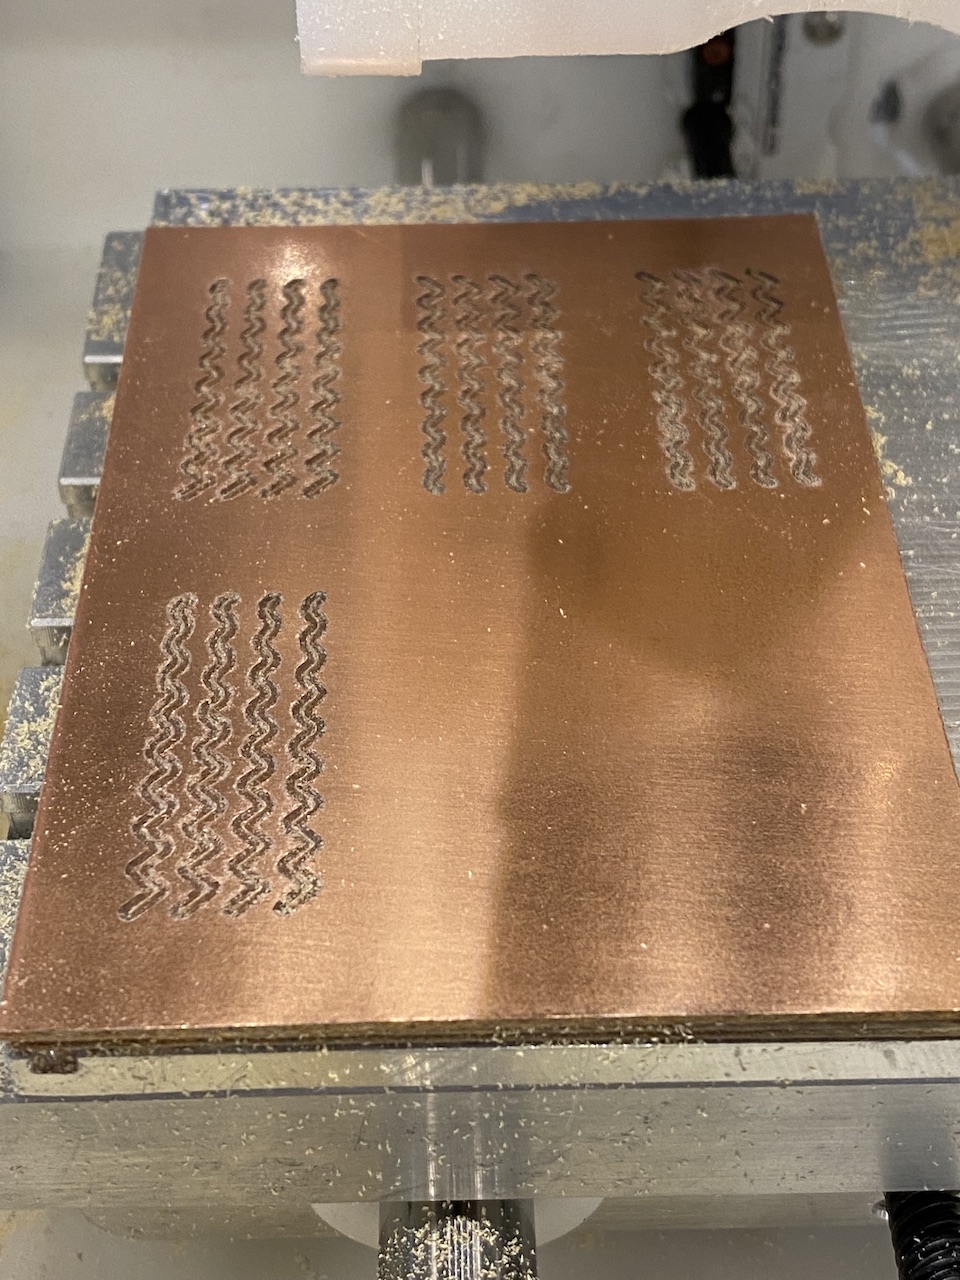
I dedicated one piece of FR1 to all my test cuts. But, since I did’t know how many tries it would take to get a successful joint, I cut one test at a time. This meant I got very familiar with the “Plan Offset” feature in Bantam tools which allowed me to start milling a new file at different points in my material.
I had just enough room left on my FR1 test sheet to cut the tinest of boxes.
Getting the right fit
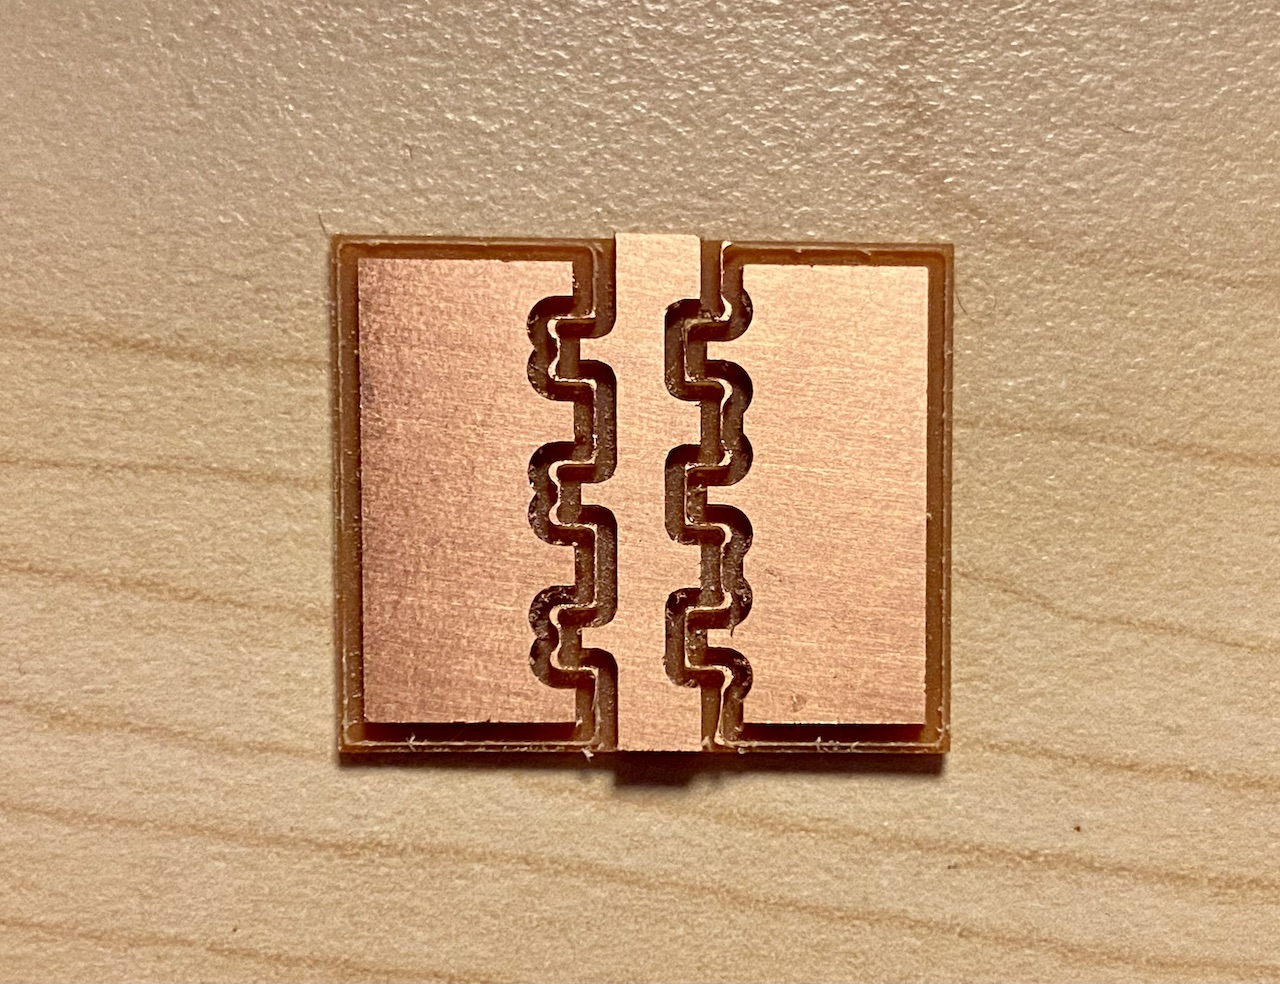
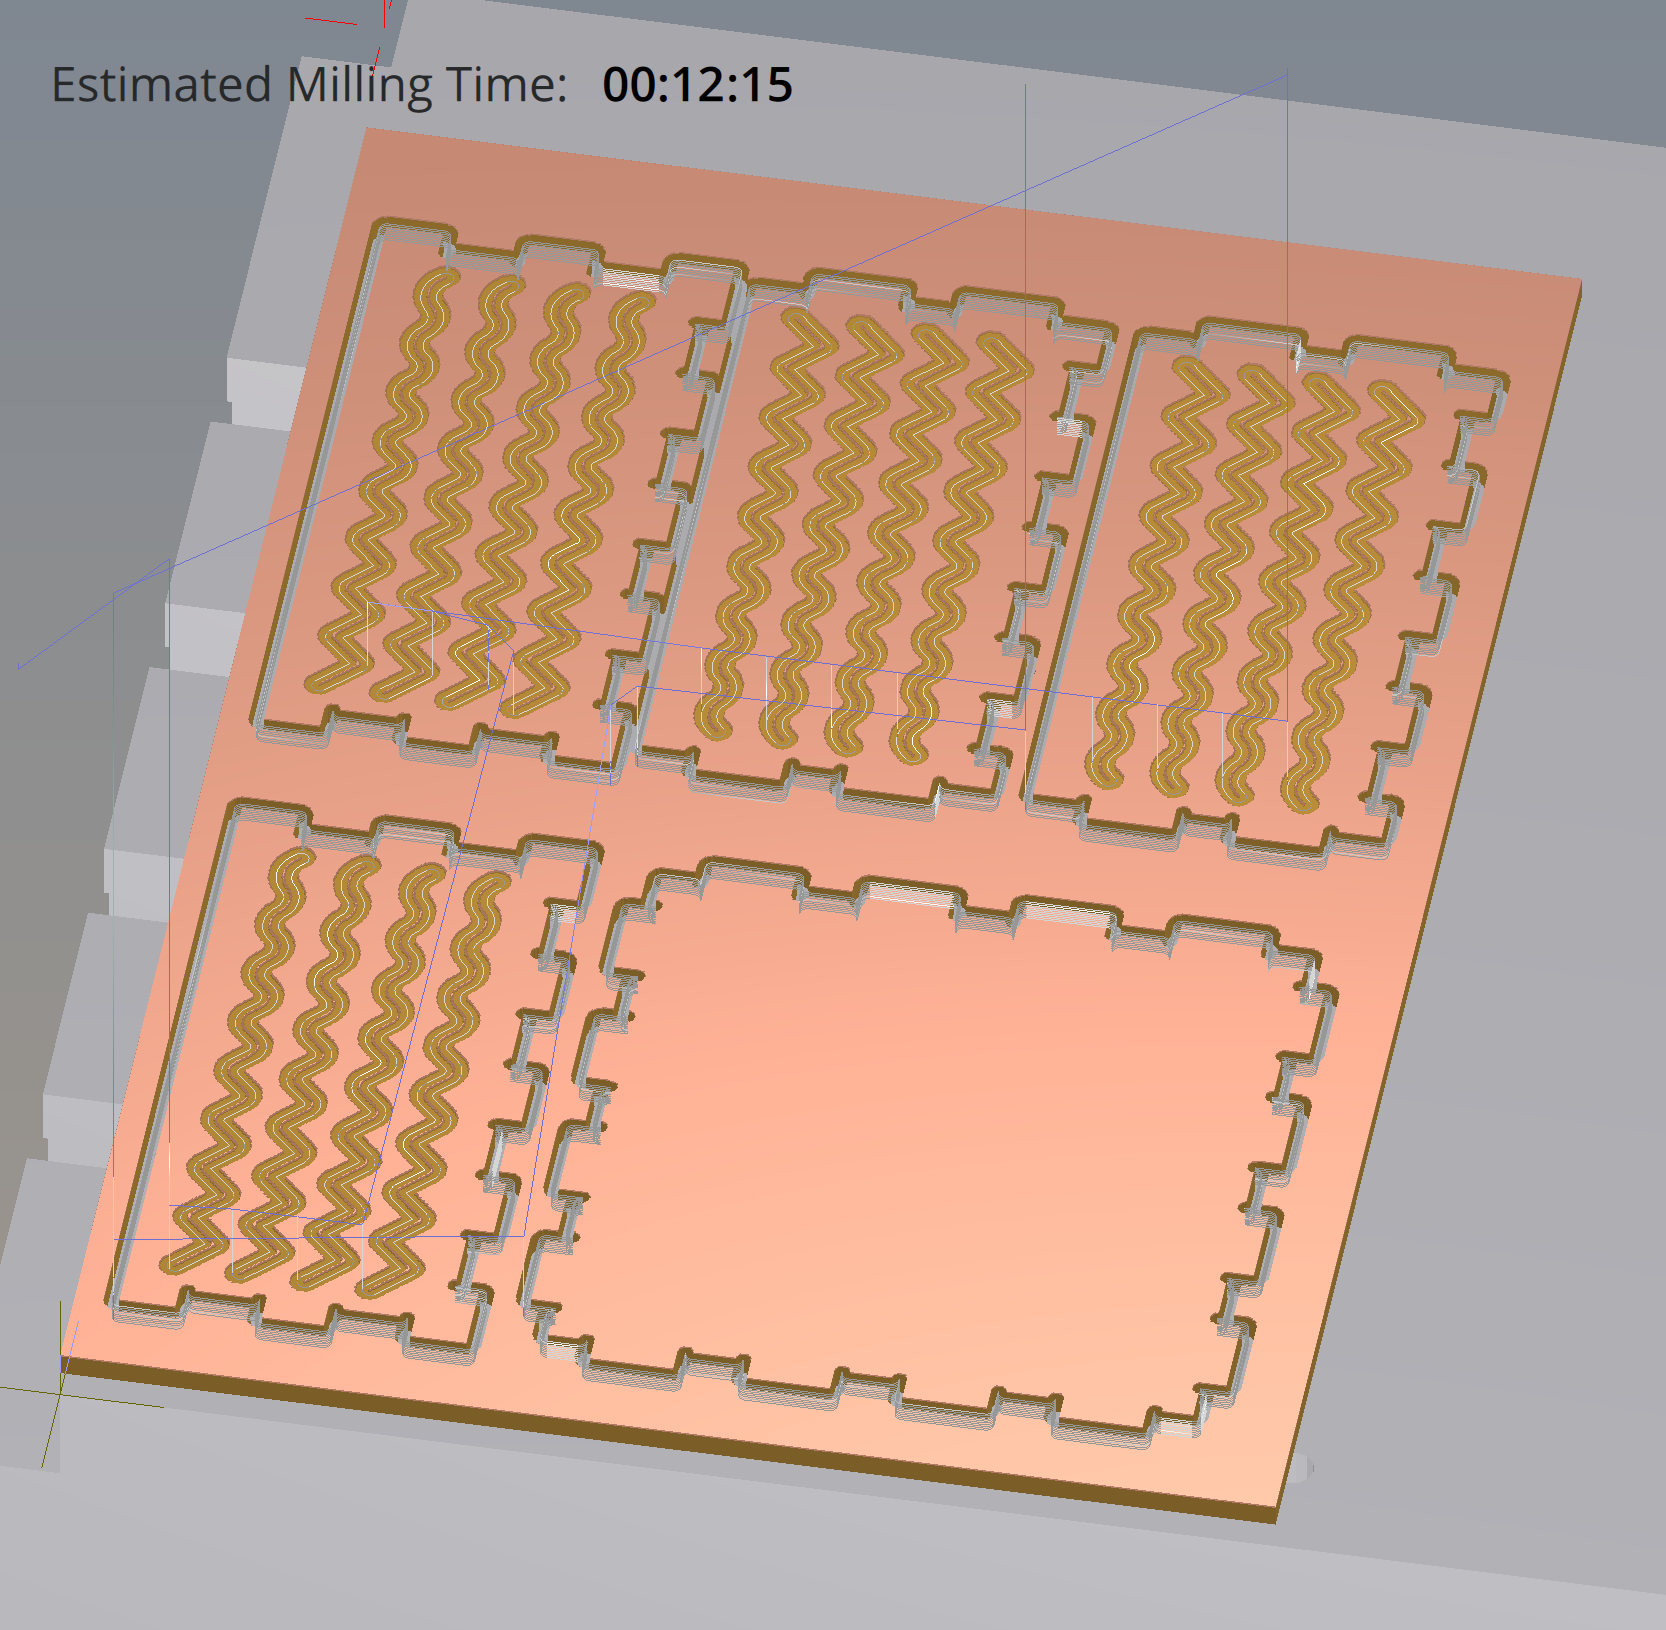
The most important part of joinery is getting the right fit. My approach to this assignment was to get a well fitting joint before desining my final box. I made a series of test pieces with different offsets until I found the right fit. I learnt an important lesson about math, if you are going to change the size of your joint, you can’t scale by percent, you have to work with offeset amounts. All of my initial joinery tests were done by reducing the finger part of the joint by percent. For my final box I translated this to a fixed offset amount.

For all these test joints, the opening is 2.5 mm.
For my first test joint, I reduced the finger by 5%, which is an offset of 0.06 mm on each side. This was too tight and the joint did not fit togetehr.
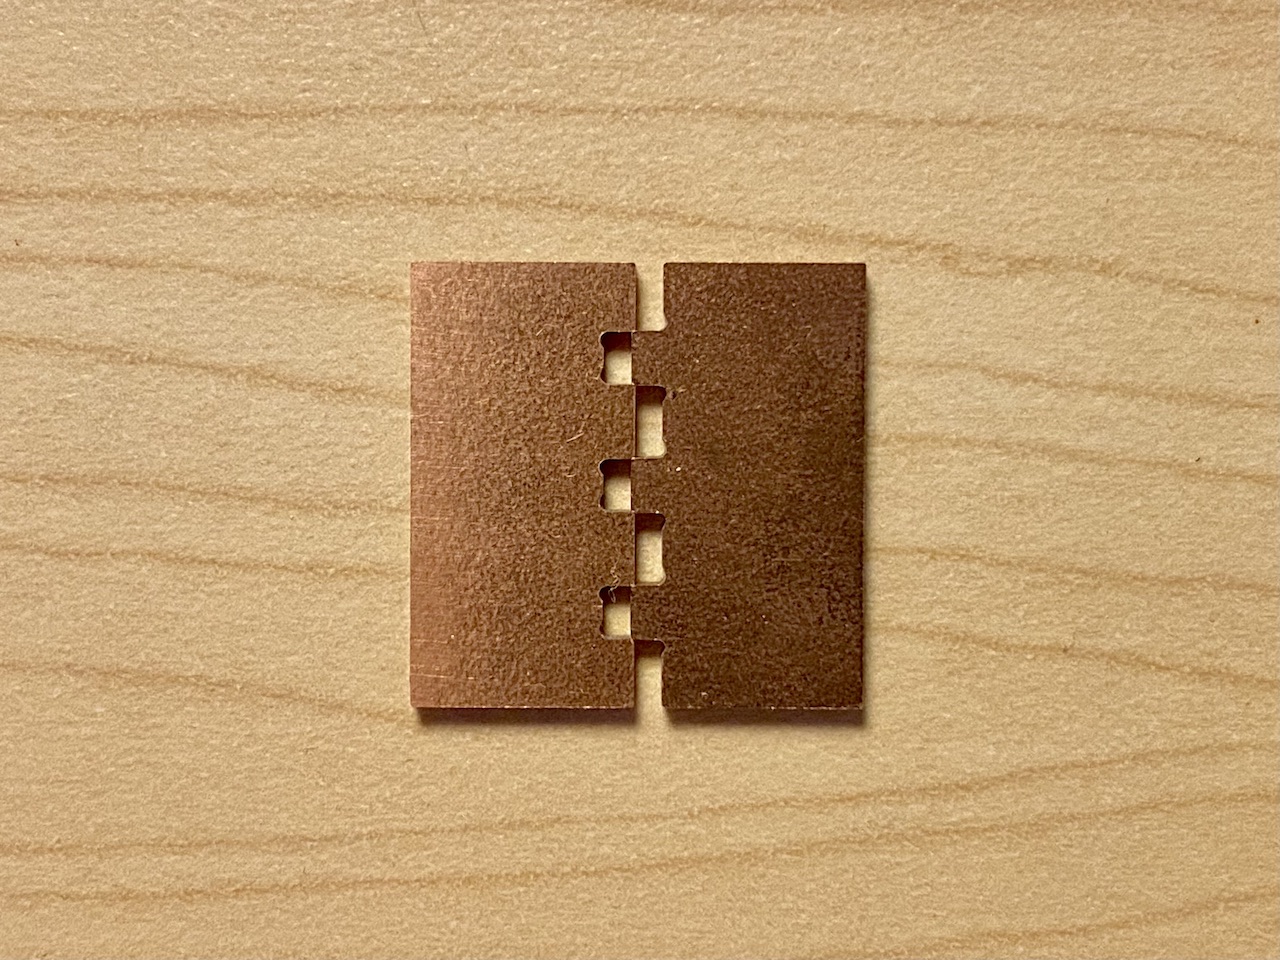
Next, I reduced the finger by 10%, which is an offset of 0.13 mm on each side. This was too loose so the joint did not hold.
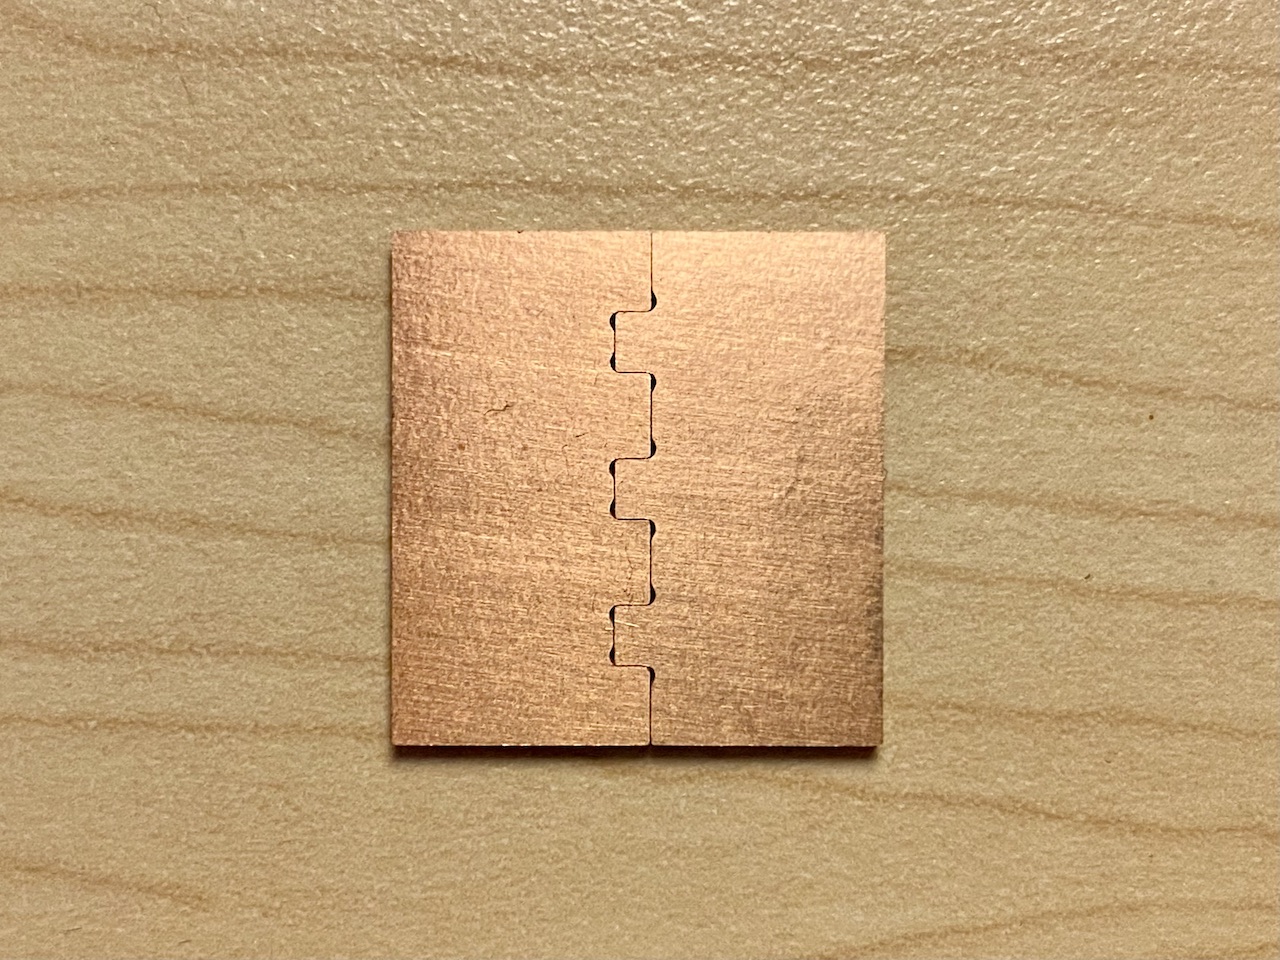
Last, I reduced the finger by 7%, which is an offset of 0.09 mm on each side. This gave a nice tight fight.
When modeling my final box in Rhino, I increased the overall size of the box and joints. I then reduced the size of the finger joint by 7%. When measuring the two pieces in Rhino I realized that the gap between the finger and the opening was too large and would not provide a tight fit. At first I was so confused why scaling the finger by the same percent didn’t work, but really it’s simple math. The material needs the same amount of space between the joint and the opening, regardless of the length of the joint. Scaling the size of the finger part of the join by a percentage assumes that the material tolerance is changing when the size of the joint changes, which isn’t the case for a material like FR1.
For my final box I modeled my joints with a 0.1 mm gap on each side. I increased the gap by 0.01 on each side from my successful joinery test becasue that test was just a little tighter than I wanted. This resulted in nice tightly fitting joints for my final box.
Making the final box
Here are some process photos from the making of the final pattern box.

Assets
Download the mini box edge cuts gbr file
Download the bigger box edge cuts gbr file
Download the bigger box engraving gbr file
Acknowledgements
Thanks to Junchao for the helpful slides! They were so useful for figuring out the correct settings in KiCad and Bantam tools, and getting set up on the mill.
Thanks to Akshay who worked with me in the mill, listened to me mumble to myself for hours, and helped me figure out why scaling different size joints by percent doesn’t work. And for taking the photo of me with my very tiny box.
And thanks to Lewis F. Day for writing a really amazing book on pattern design which gave me the inspiration for the pattern on my box. Find the book here!