A2: Parametric Modeling with Grasshopper
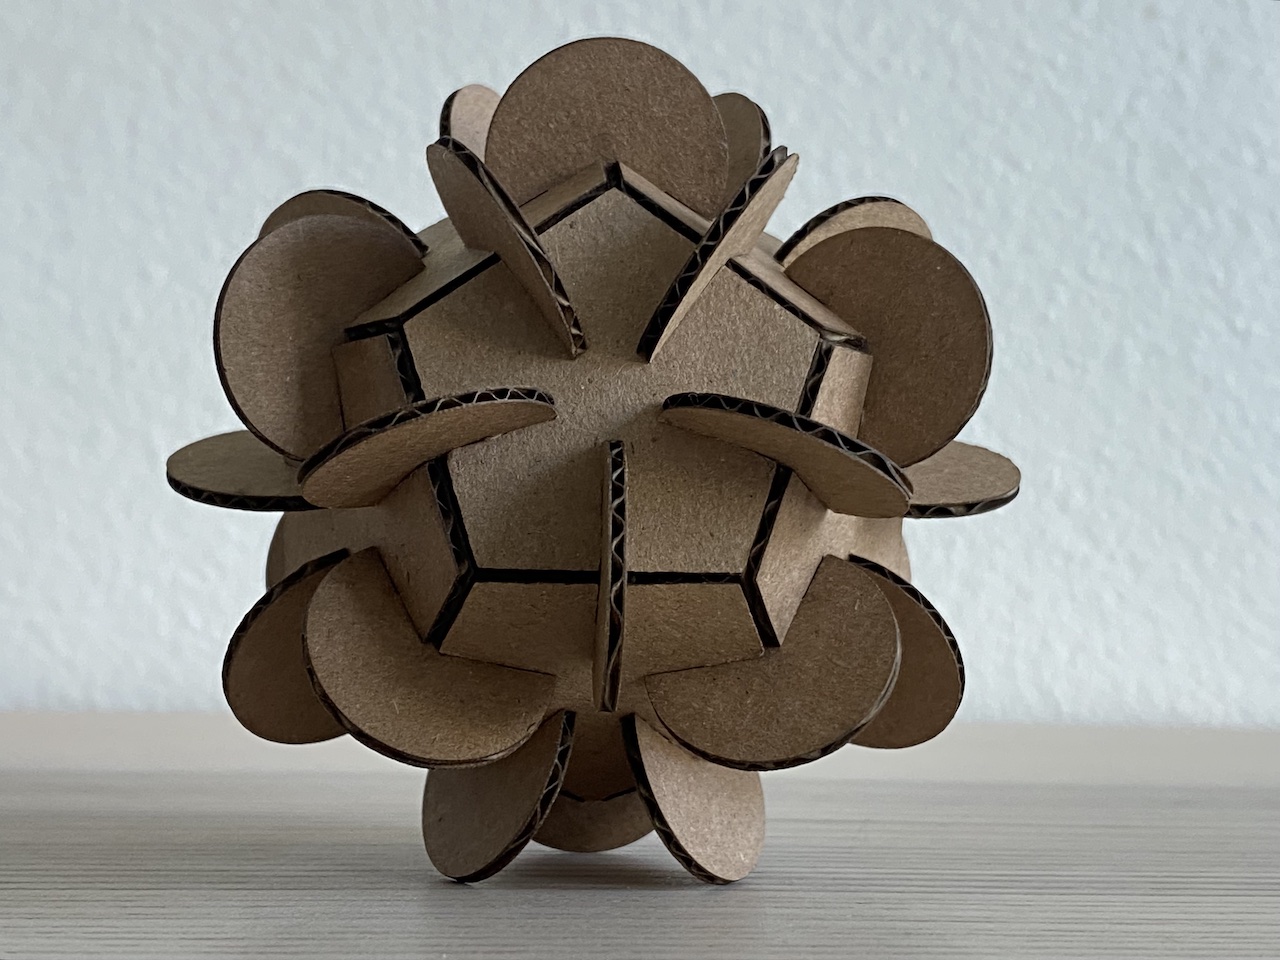
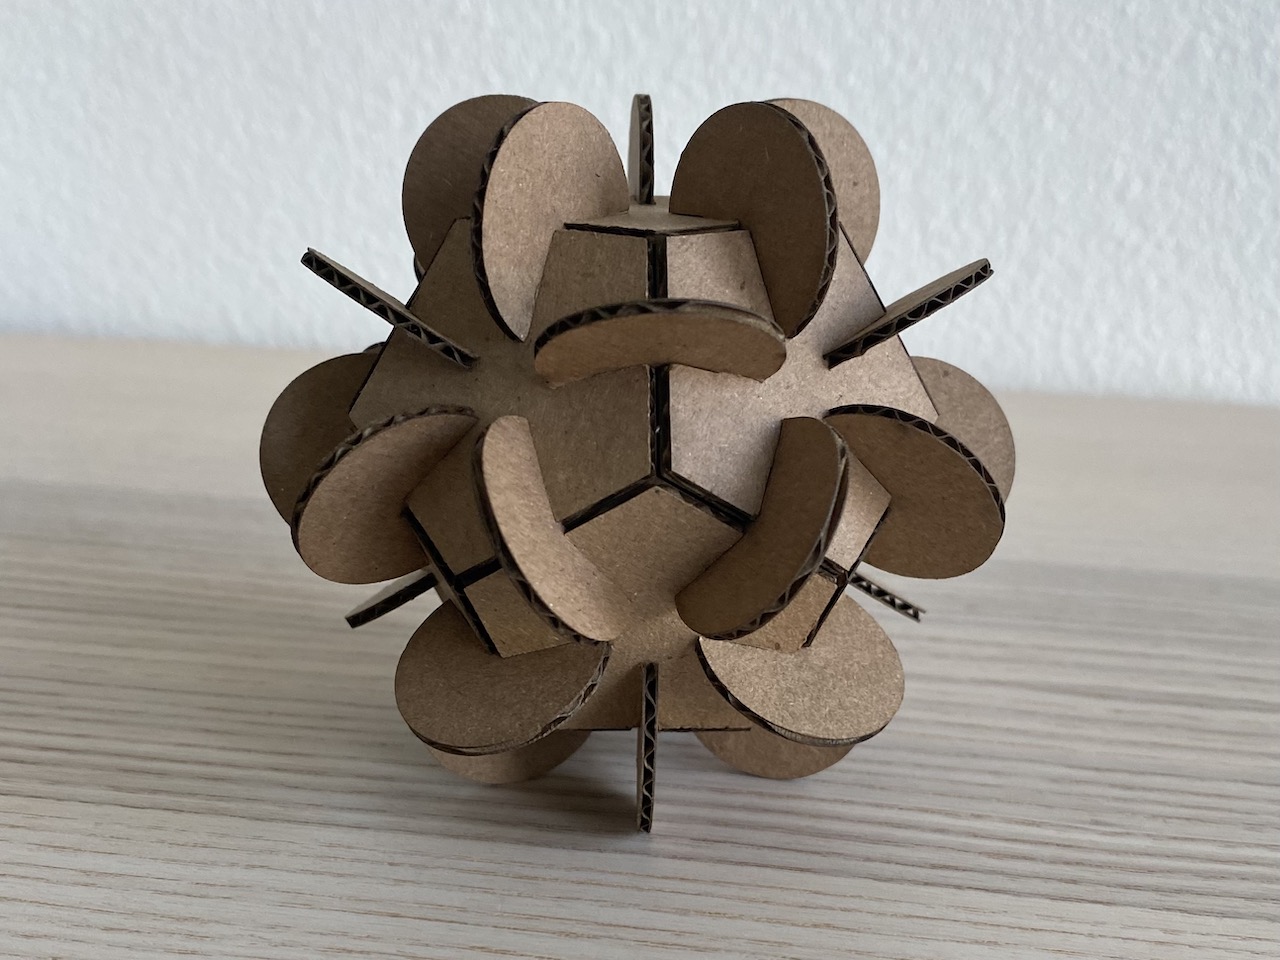
Final Object
I kept it simple this week. I built on my concept from last week of using simple shapes to create closed geometric forms. For this assigment I used pentagons and circular connectors to make a regular dodecahedron. It has 12 faces and uses 30 connectors.
Modeling Process
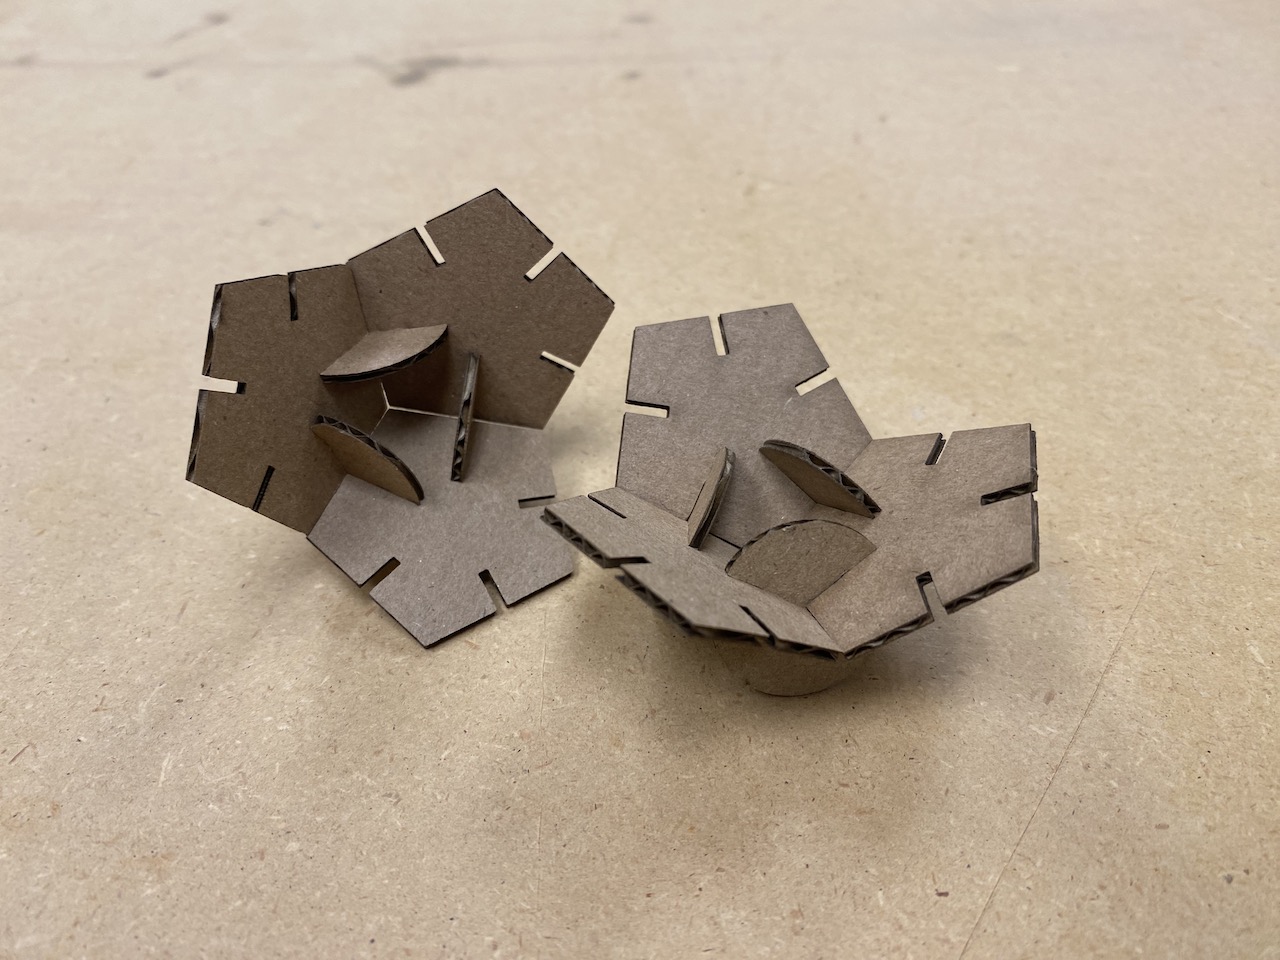
Pieces before assembly

Assembly process
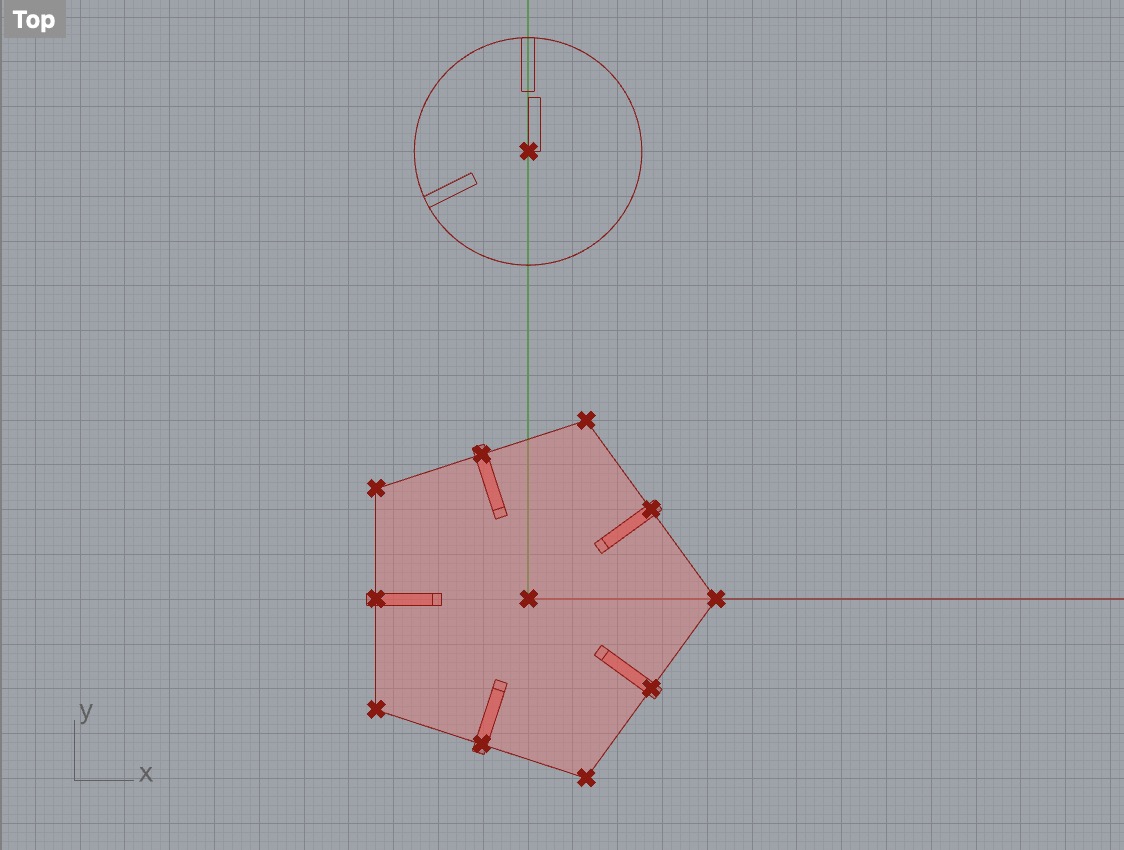
Grasshopper Models
Here are the two grasshopper models for my polygon and connection piece. They are basically the same models covered in class and the recorded tutorial, with some minor adjustments.
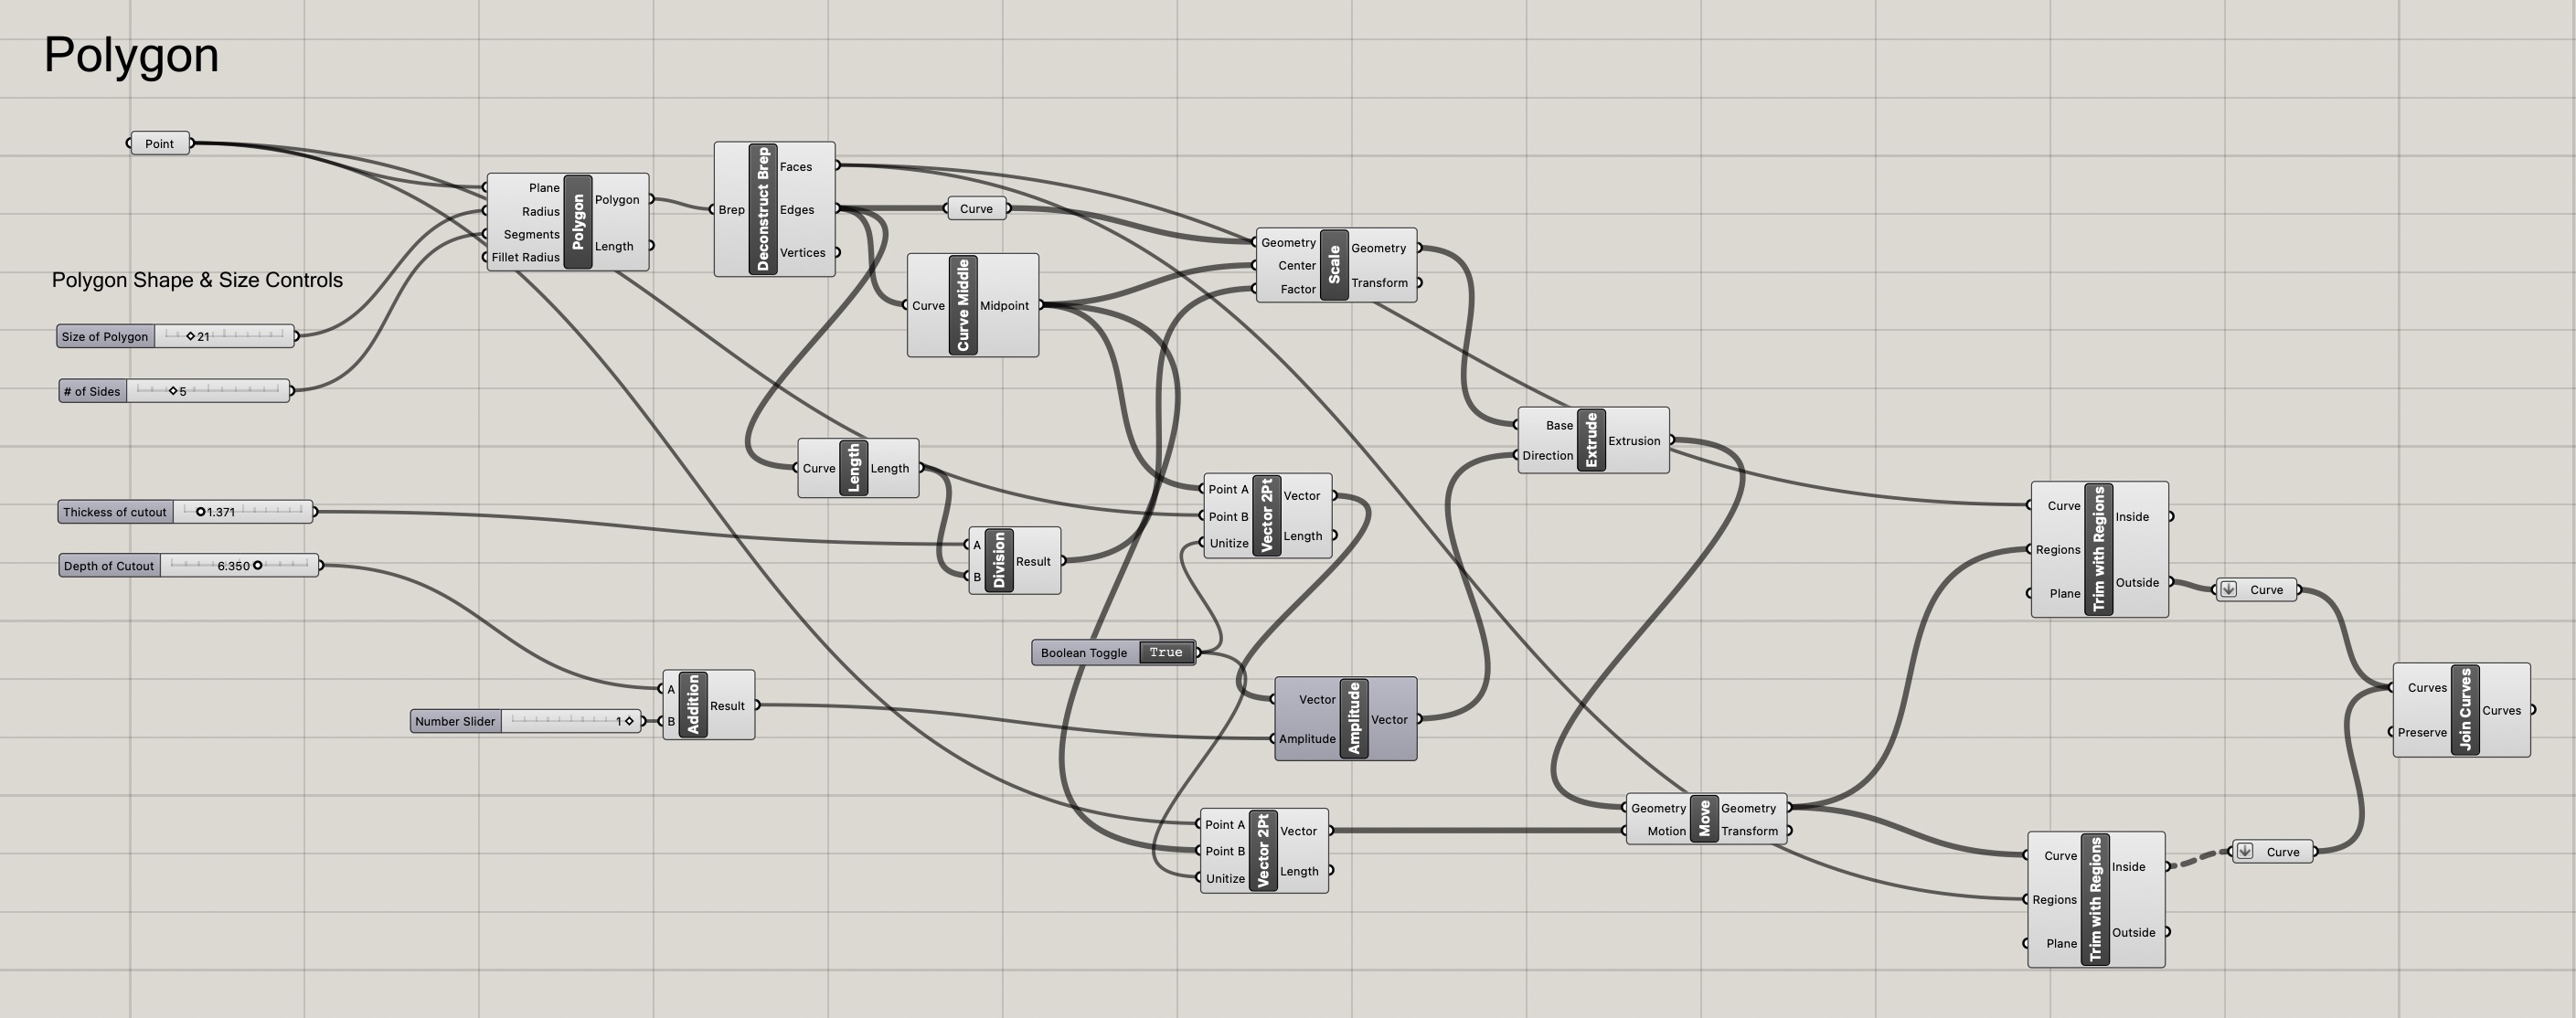
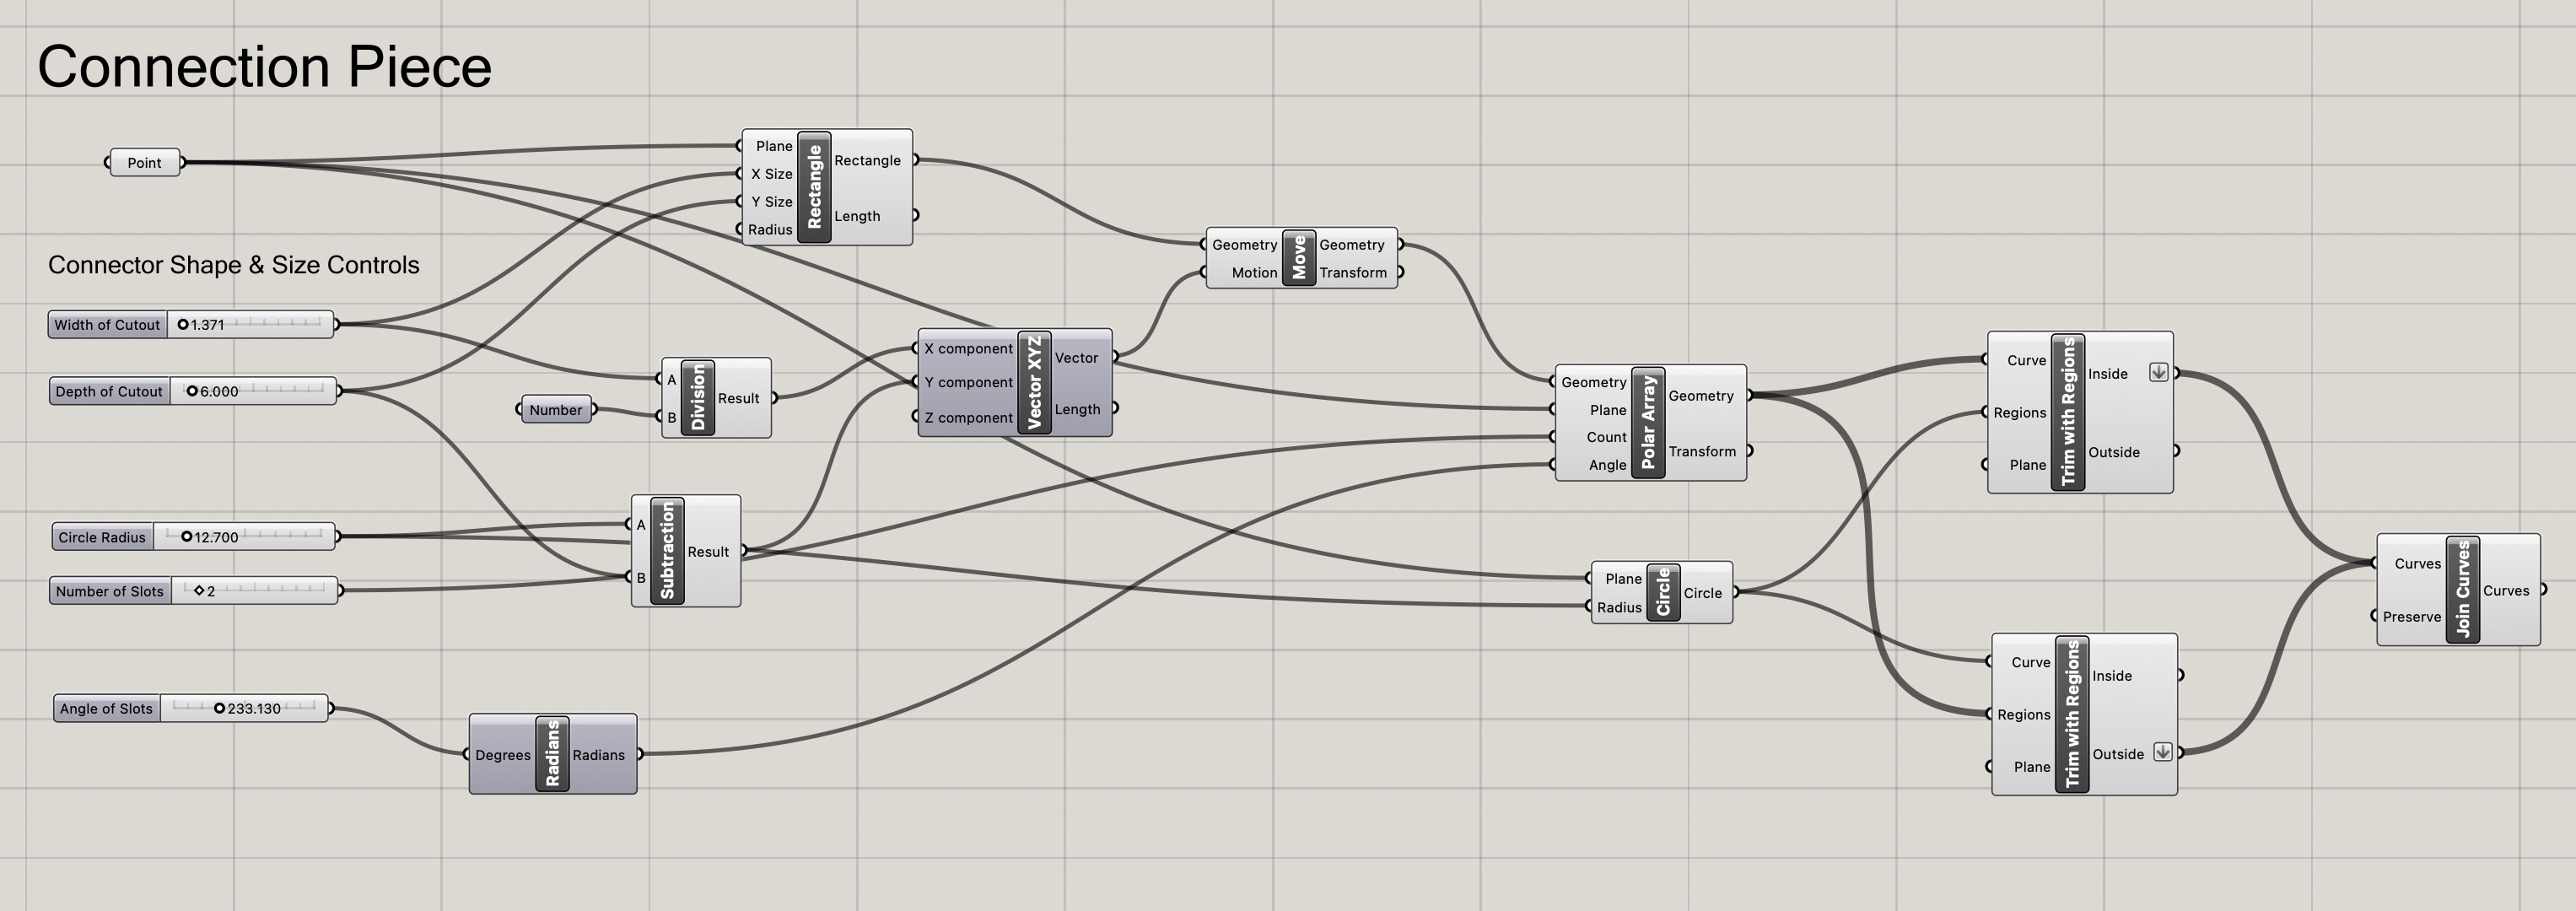
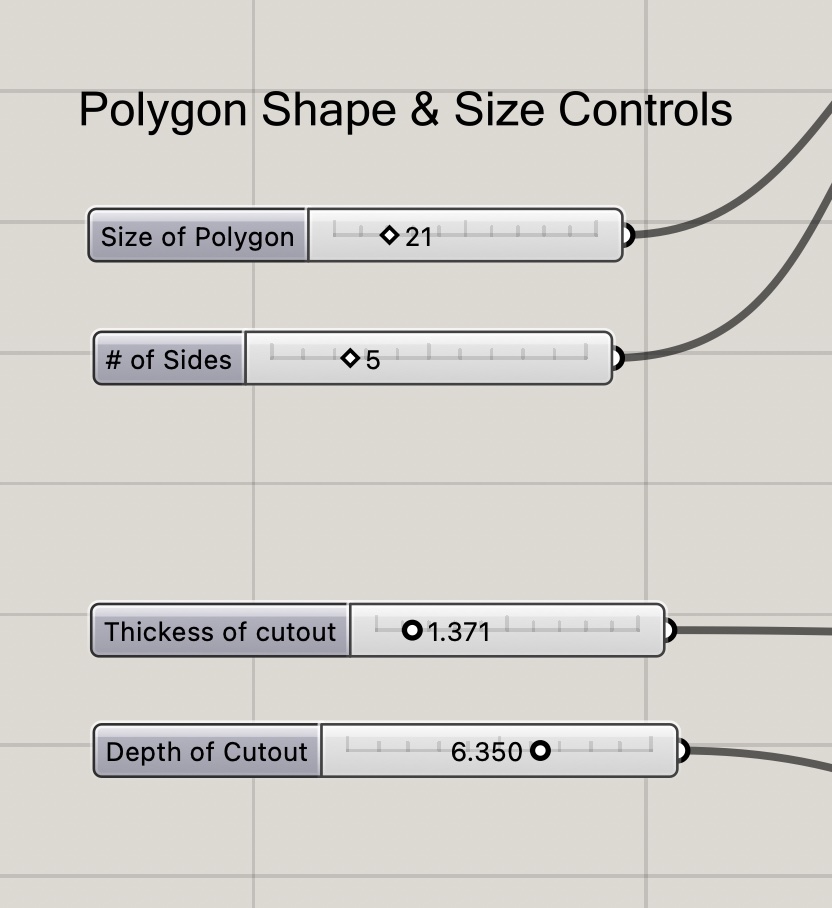
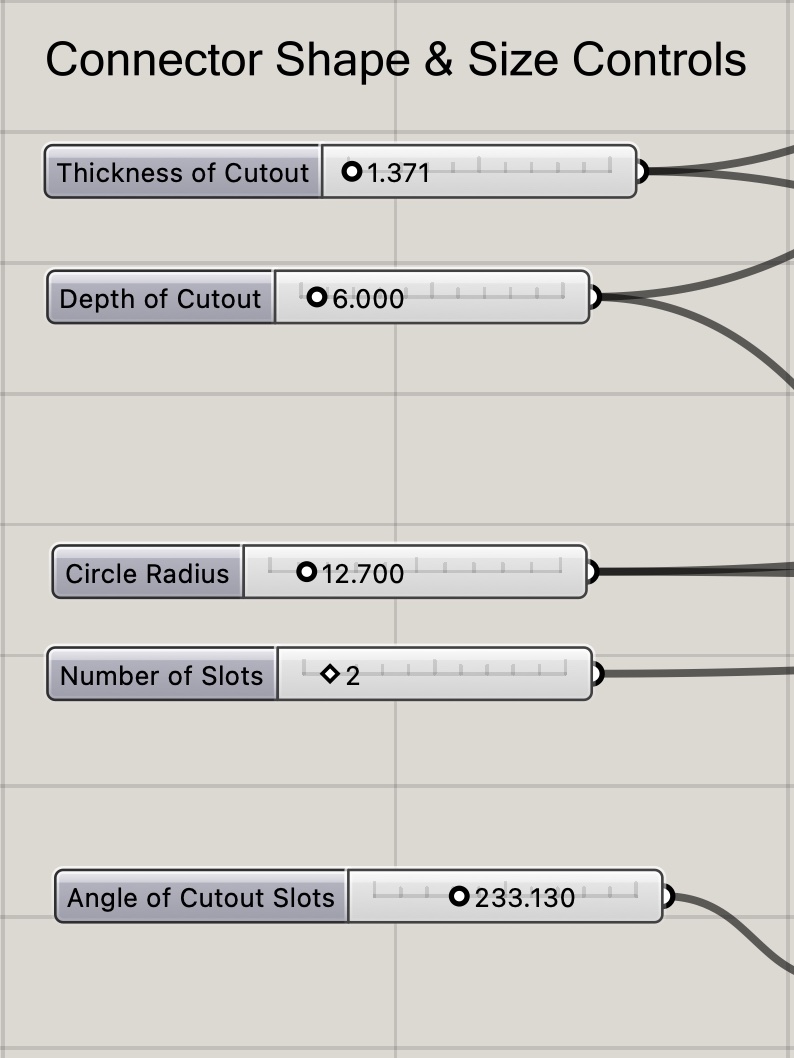
Both the polygon and the connection piece have moditifaction controls that allow elemnts such as the shape, cutout dept, and cutout width to be easily changed. These inputs are grouped and labeled at the start of each grasshopper definition.
The polygon can be midified to change the overall size of the polygon, number of sides, thickness of the cutout (corresponding to the material thicnkess), and depth of the cutout.
The connection piece can be modified to change the thickenss of the cutout (corresponding to the material thicnkess), depth of the cutout, circle radius, number of cutout slots, and the angle between the cutout slots.
One issue I ran into was the angle input. It took me a while to figure out that grasshopper was expecting radians and I was inserting degrees. I added a node to convert from degrees to radians but I still got an odd output. When I input 360º the cutout pieces only did a half rotation, instead of a full one. I’m think that math from some other part of the model was interfering with the conversion. I took the easy way out and just doubled my degree input, but it would be good for me to eventually figure out what was causing the issue.
Layout of pieces to cut
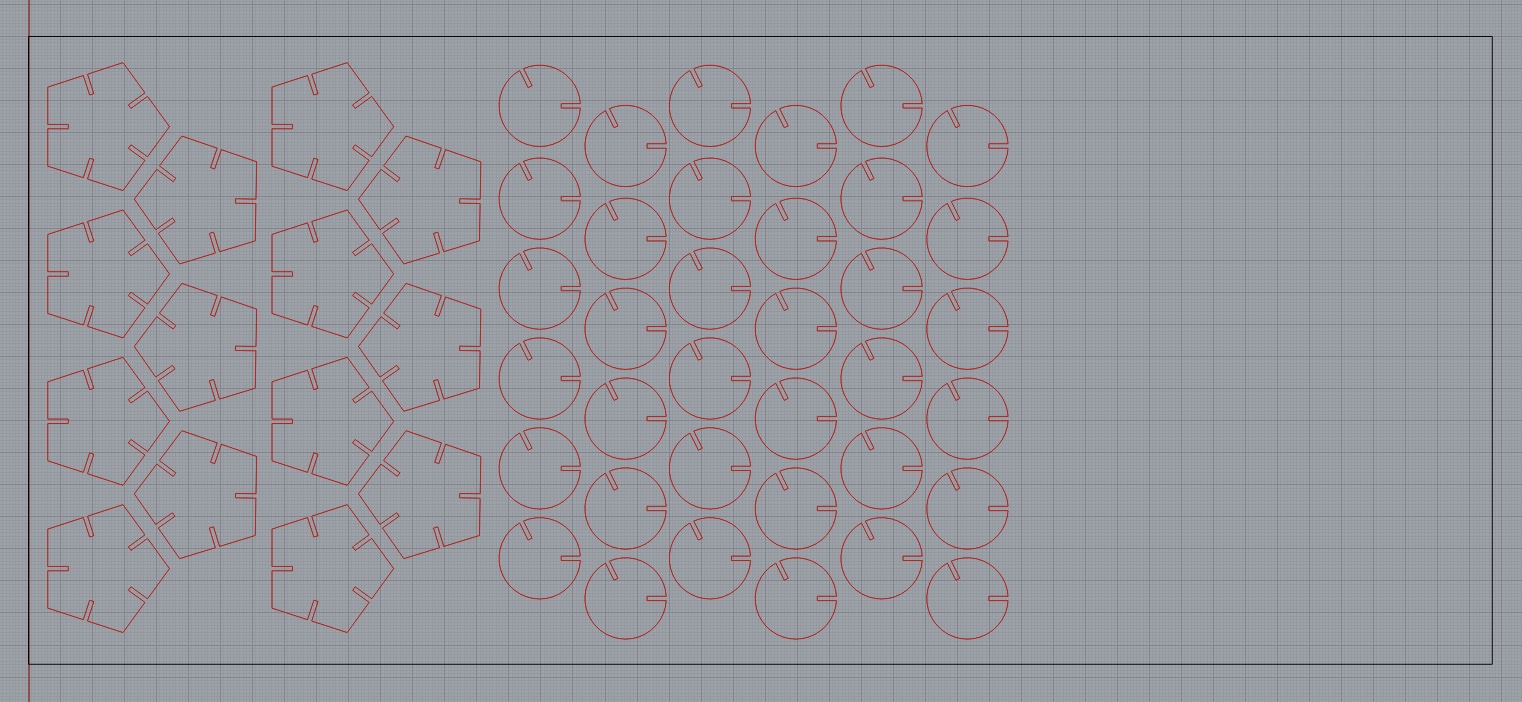
I made copies of the baked pieces and arranged them for cutting. I think exported this to an AI file, changed the line thickness to 0.01 pt, and sent it off to the laser cutter. I cut using the same settings as last week, using the default settngs from the material library for mat board and adjusting the material thickness to 0.067”.
Takeaways
This week I learned that the type of logic and deductive reasoning needed to model with grasshopper is not something that comes naturally to me. I relied on just the content in the in-class demo and Junchao’s recorded tutorial to make my pieces. Grasshopper is something that I definitely need more practice with, as it doesn’t yet feel intuitive for me.
Acknowledgements
Thanks to Junchao’s for making that recorded tutorial. A lot of the explinations were very helpful for me to understand how grasshopper works!
Thanks to Paramarch for this youtube video which helped me realize I needed to be converting degrees to radians in order to get my connecting piece to allow for an angle input field.
And Thanks to Akshay who offered to laser cut my pieces since I was sick. I ended up being able to make it to The 8 and get my pieces cut, but it was such a relief knowing that I could rely on someone for help if I needed it!